10 minutes
Getting to grips with WVD
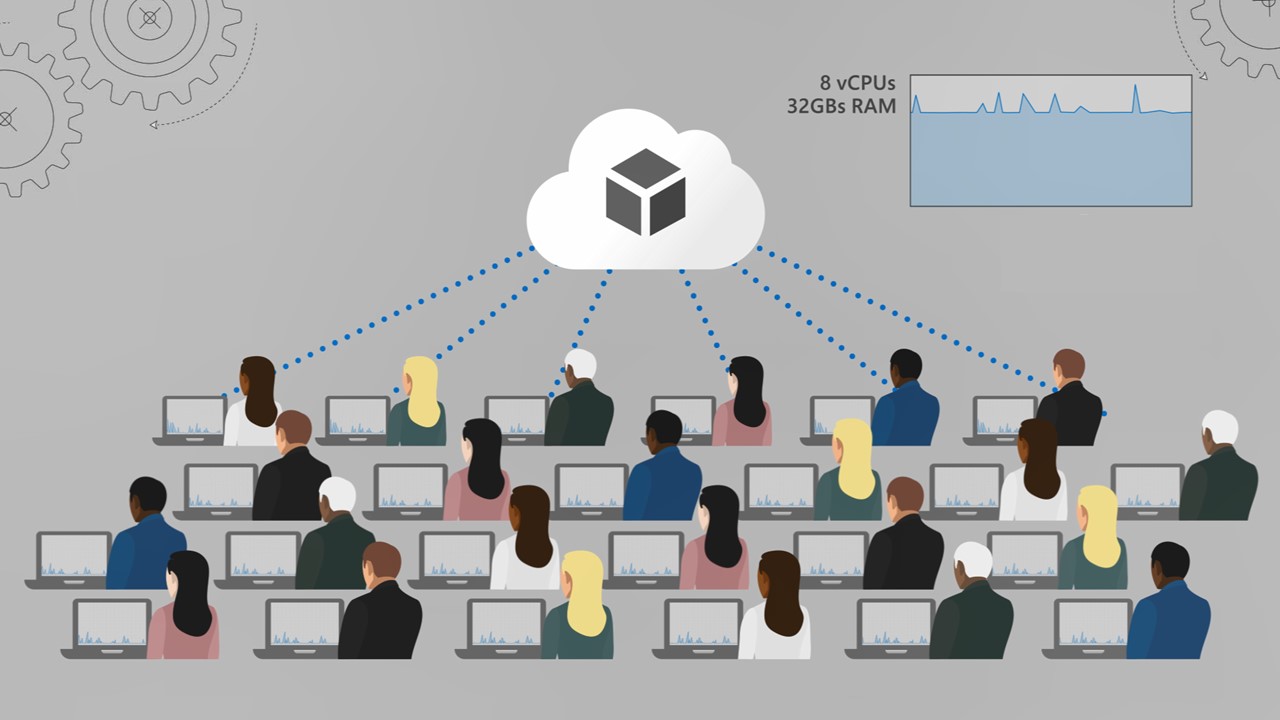
After much anticipation I finally had some proper time this last week to spend tinkering with Windows Virtual Desktop (WVD). For those unfamiliar, think of WVD as Remote Desktop Services (RDS) “as a service”. Microsoft manage and maintain common elements of the (shared) service infrastructure, removing the need for you to administer the underlying elements of RDS. It also supports a new “Enterprise for Virtual Desktops” edition of Windows 10 - providing multi-user, desktop operating system RDS for the first time.
I’ve been excited for the release since it was announced last year. As an organisation we ran sessions on WVD at Future Decoded, and I’ve been hinting at it’s potential for various use cases for the last 6 months or so. The challenge - as is always the case with “new” things - is whether it proves to be all it can be…
First Things First
Taking a step back, I’ve worked with Remote Desktop solutions of various sorts for a lot of years now. Traditional RDS (and Terminal Services back in the day!), Citrix XenApp, and VDI solutions like XenDesktop / Horizon View. Common to all of those is an increasing movement away from them in recent years, favouring more modern ways of working. Software as a Service adoption, advancements in MDM / MAM, and user expectations around how and when they should work have all played a part in shifting the focus from centralisation of data, to security of data beyond the LAN.
Some have speculated that Microsoft have missed the boat when it comes to Desktop as a Service, but I disagree…In spite of advancements, many organisations still have a need for a centrally administered user desktop experience. That’s unlikely to change in the short-medium term. For some this is driven by legacy application requirements, for others there are legitimate security constraints. Whatever the rationale, the introduction of a simple, low overhead desktop solution is a welcome addition - especially if it’s executed by Microsoft in the which we all hope it will be 🙂
Prerequisites
Before you get cracking with rolling out WVD, there are some things you need to consider:
Licensing: To date if you wanted to connect remotely to desktop operating systems you needed to subscribe to Windows 10 Virtual Desktop Access (VDA) licenses. Alternatively you needed to have purchased Windows 10 with Software Assurance. The approach to licensing WVD is considerably more flexible; extending eligible licenses to Windows 10 / Microsoft 365 subscription SKU’s.
Active Directory: Traditional Active Directory is a requirement for WVD - either full-blown AD in Azure, or Azure AD Domain Services. Native support for Azure AD isn’t available; unsurprising in many respects, but disappointing none the less for “Cloud First” organisations.
Profile Strategy: As you would in the “real world”, you need to plan a strategy for user profiles. This will be dictated in part by your choice of desktop approach (pooled, or personal). In any case, there’s a strong chance you’ll want to consider the use of FSLogix Profile Containers and Office 365 Containers. It’s been announced that both of these solutions will be included in the imminent FSLogix / Microsoft re-brand. Even more excitingly, these will be free for all subscribers of:
- Microsoft 365 E3 / A3
- Microsoft 365 E5 / A5
- Windows 10 Enterprise E3 / E5
- Windows 10 Education A3 / A5
- Remote Desktop Services (RDS) CAL (Purchased, or via CSP Subscription)
- Windows 10 VDA
Deployment
Microsoft have published a pretty comprehensive tutorial on how to get up and running on the WVD section of Microsoft Docs. For those interested, the high-level steps you need to take are as follows - interjected with a few of my own thoughts along the way.
Prepare the Infrastrucutre
- Consent to, and trigger the creation of the Server / Client App’s for Windows Virtual Desktop in Azure AD. You complete this at the WVD Consent Page and will need your Azure AD Tenant GUID. Don’t forget to repeat this for both the Server App and Client App registrations. On completion you should see two new Enterprise Applications registered in Azure AD: “Windows Virtual Desktop”, and “Windows Virtual Desktop Client”.
- Assign TenantCreator permissions on the new “Windows Virtual Desktop” Enterprise Application to the user who will establish the WVD tenant.
- Install and import the Windows Virtual Desktop PowerShell module on the machine(s) you will administer WVD from. Note that at the time I write this, much of the administration of WVD is PowerShell based. A new WVD management portal is in the works, but is unlikely to be released during the preview period.
- Create a WVD Tenant - this only needs to be done once using the following command(s):
# Connect to the WVD Service
Add-RdsAccount -DeploymentUrl "https://rdbroker.wvd.microsoft.com"

# Provision the Tenant
New-RdsTenant -Name <TenantName> -AadTenantId <DirectoryID> -AzureSubscriptionId <SubscriptionID>
- Create a Service Principal to use during the creation of the host pool. This step is optional, but recommended. Without defining a Service Principal, username / password credentials need to be used for Host Pool authentication to the WVD service. To create a Service Principal, ensure you have the Azure AD cmdlets installed and then run the following command(s):
# Define Variables:
$TenantGroupName = "Default Tenant Group"
$TenantName = <Tenant Name>
$aadContext = Connect-AzureAD
$svcPrincipal = New-AzureADApplication -AvailableToOtherTenants $true -DisplayName "Windows Virtual Desktop Service Principal"
$svcPrincipalCreds = New-AzureADApplicationPasswordCredential -ObjectId $svcPrincipal.ObjectId

# Connect to the WVD Service:
Add-RdsAccount -DeploymentUrl "https://rdbroker.wvd.microsoft.com"

# Define the Service Principal & Permissions:
New-RdsRoleAssignment -RoleDefinitionName "RDS Owner" -ApplicationId $svcPrincipal.AppId -TenantGroupName $TenantGroupName -TenantName $TenantName

$creds = New-Object System.Management.Automation.PSCredential($svcPrincipal.AppId, (ConvertTo-SecureString $svcPrincipalCreds.Value -AsPlainText -Force))

# Connect as the new SPO:
Add-RdsAccount -DeploymentUrl "https://rdbroker.wvd.microsoft.com" -Credential $creds -ServicePrincipal -AadTenantId $aadContext.TenantId.Guid

#Verify Service Principal Access:
Get-RDSRoleAssignment -TenantGroupName $TenantGroupName -TenantName $TenantName

# Output the SPO Password & Application ID - Save these for Later Use
$svcPrincipalCreds.Value
$svcPrincipal.AppId
Create the Desktop Environment
- Deploy a Host Pool using the “Windows Virtual Desktop - Provision a host pool” entry from the Azure Marketplace. Most of the steps in this wizard will be self-explanatory and unique to your environment.
- When prompted for the usage profile and number of users, the template will make an assessment on the best instance type and volume of VM’s required. This can be tailored, and also influenced by the load balancing method chosen (Breadth First, or Depth First). I won’t be going into the detail of these aspects in this post, but know that there is significant capability within WVD to automate the scale up, scale down, and placement of users based on various performance metrics.
- For the purpose of testing I elected to use the gallery Windows 10 image. You are able to prepare and register your own if you prefer - additional steps apply in this case. Again, I won’t be covering these elements in this post, but I’m happy to address questions in the comments and may focus a future post on this aspect of WVD.
- On the “Authenticate to Windows Virtual Desktop” section of the Host Pool creation wizard, choose whether the username / password, or Service Principal authentication method is to be used and populate the relevant fields. If you are enforcing MFA on all user accounts, a service principal is required.
- On completion, you will be able to confirm the successful creation of your host pool through the presence of Virtual Machines in the Resource Group you defined, and via the creation of a Host Pool object. To view details, run the following command from a PowerShell session connected to your WVD Tenant:
Get-RDSHostPool -TenantName <tenantname>
Connect to the Service
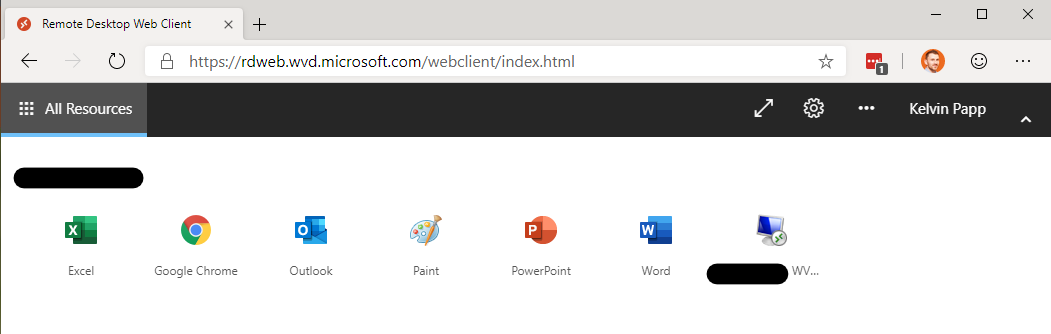
At a basic level, your WVD Deployment is complete. You should be able to connect to your desktop(s) with the accounts specified in the Host Pool creation wizard. This can be done with the Web Client (accessible here), or by installing the preview version of the Remote Desktop Client, available here.
To add or remove users to the Virtual Desktop, use the following commands:
# Connect to the WVD Service:
Add-RdsAccount -DeploymentUrl "https://rdbroker.wvd.microsoft.com"

# Assigning User(s) to the Published Desktop:
Add-RdsAppGroupUser <Tenant Name> <Host Pool Name> "Desktop Application Group" -UserPrincipalName user@domain.com

# Removing User(s) from the Published Desktop:
Remove-RdsAppGroupUser <Tenant Name> <Host Pool Name> "Desktop Application Group" -UserPrincipalName user@domain.com
It’s not possible to use Active Directory Groups for the assignment of permissions (at the moment).
Application Publishing
You’ll notice from the above screenshot that it’s also possible to publish applications to users, not just full desktops (RemoteApp). There’s an important thing to highlight on this front when it comes to WVD. Before I explain, I’ll provide a brief overview of the terminology used to assist:
The basic elements of WVD are:
- Host Pools: Containers that house Virtual Machines to deliver desktop / application resources, and Application Groups. Load Balancing attributes and session limits are defined at the Host Pool level.
- Application Groups: Determine the type, and detail of resources published to assigned users. They have a Resource Type designation of either Desktop, or RemoteApp, but not both.
“Now what’s that important thing”, I hear you cry? Well…it’s this. Users need to be assigned to the Application Groups that host the resources we want to give them access to. There will be scenarios where you want to provide flexibility around the user experience - enabling the choice of accessing either desktops or applications. At the time of writing, a user can only be assigned to one Application Group in any single Host Group. To accommodate this flexibility then, you need multiple Host Groups to support a mix of RemoteApp and Desktop assignments for users.
This isn’t a show stopper by any stretch. It does require you to double up on session host infrastructure though, and makes the overall experience that little bit more complex.
RemoteApp Configuration
To publish applications to those users who will also be accessing desktops, we first need to create a second Host Pool. If this doesn’t apply, then the below steps can be run on same pool you will be using for Desktop access.
Run the following commands to create a new Application Group, and to assign users:
# Create the Application Group:
New-RdsAppGroup <Tenant Name> <Host Pool Name> <Application Group Name> -ResourceType "RemoteApp"

# Verify Creation:
Get-RDSAppGroup <Tenant Name> <Host Pool Name> <Application Group Name>

# Assign User(s) to the Application Group:
Add-RdsAppGroupUser <Tenant Name> <Host Pool Name> <Application Group Name> -UserPrincipalName user@domain.com

# Verify User Assignment:
Get-RdsAppGroupUser <Tenant Name> <Host Pool Name> <Application Group Name>
Once the Application Group is created, you need to define the individual applications for publishing. Run the following to retrieve the available application aliases from the Session Host Start Menu. We use these to define the RemoteApp objects within the Application Group:
# List Available Applications:
Get-RdsStartMenuApp <Tenant Name> <Host Pool Name> <Application Group Name> | Select FriendlyName,AppAlias

# Define RemoteApp Applications (Examples):
New-RdsRemoteApp  <Tenant Name> <Host Pool Name> <Application Group Name> -Name "Word" -AppAlias word
New-RdsRemoteApp  <Tenant Name> <Host Pool Name> <Application Group Name> -Name "Excel" -AppAlias excel
New-RdsRemoteApp <Tenant Name> <Host Pool Name> <Application Group Name> -Name "Paint" -AppAlias paint
New-RdsRemoteApp <Tenant Name> <Host Pool Name> <Application Group Name> -Name "Google Chrome" -AppAlias googlechrome

# Verify RemoteApp Creation
Get-RdsRemoteApp  <Tenant Name> <Host Pool Name> <Application Group Name>
Summary
That’s a wrap for this post 🙂
There’s a whole lot more I could dive into on Windows Virtual Desktop. Some things I’ve referenced in this post, others may crop up as you start to spend time with the product. Needless to say though, this post is plenty long enough already, and if you’ve made it this far you’ve done well 🙂
I plan to put some other more specific posts together on some of the more involved functionality of WVD. Some PowerShell tips and tricks covering deployment and administration, in addition to some deep-dives on specific functional areas like Profile Management and Scaling. Irrespective, I’d welcome comments and feedback from anyone else who’s dabbled with it to date - feel free to get in touch.